Unreal Material Layer Experiments
As we continued working on our project we quickly ran into some texture resolution problems as we began modeling on big objects. So we talked about using Unreal's really powerful Material layers. As the name suggests, it allows us to...blend materials together and allows us to create custom graphs to define the way the several materials blends together.
So basically we setup a library of materials layer instances, in which we control the map used (Diffuse, Normal, AO, Specs, and cavity and Emissive), the UV tiling offset and projections and several other cool parameters as tint variations driven by masks or parallax controled emissive.
Also we have a Material layer blend library, as said earlier they are used as "tools" to define how the different materials blend. Usually we use masks to drive the blends. We can control the mask projection or we also use the heightmap to create variations or we also use a separate uvset to add details from a normal map.

Arch gate for a bridge - We used several materials layers to texture and render this asset. For instance, for the bricks, we use three variations of the same substance, then we use a RGBA mask to modulate those variations on the mesh.

Arch gate for a bridge - close up

Arch gate for a bridge - close up

Arch gate for a bridge - Detail lightning

Shader Complexity - Of course the more layer there is the more complex the shader is.

Material Breakdown view of the arch - For each different color there's a separate material instance.
The heigthmap can be contrasted to modify how the depth will impact the blend. This MLB "DEBUG heightmap" serves only to review and modify the contrast and balance of the heightmap.
In the material layer, we can work with the UVs, or chose for a triplanar projection.
In the material layer we can add, in the emissive slot, a RGBA mask to control the color of our textures.
In this material layer we used heightmap to add a little parallax effect for the light coming out of the windows. To avoid the "on/off" effect of a plain emissive texture to make our building a little more natural.
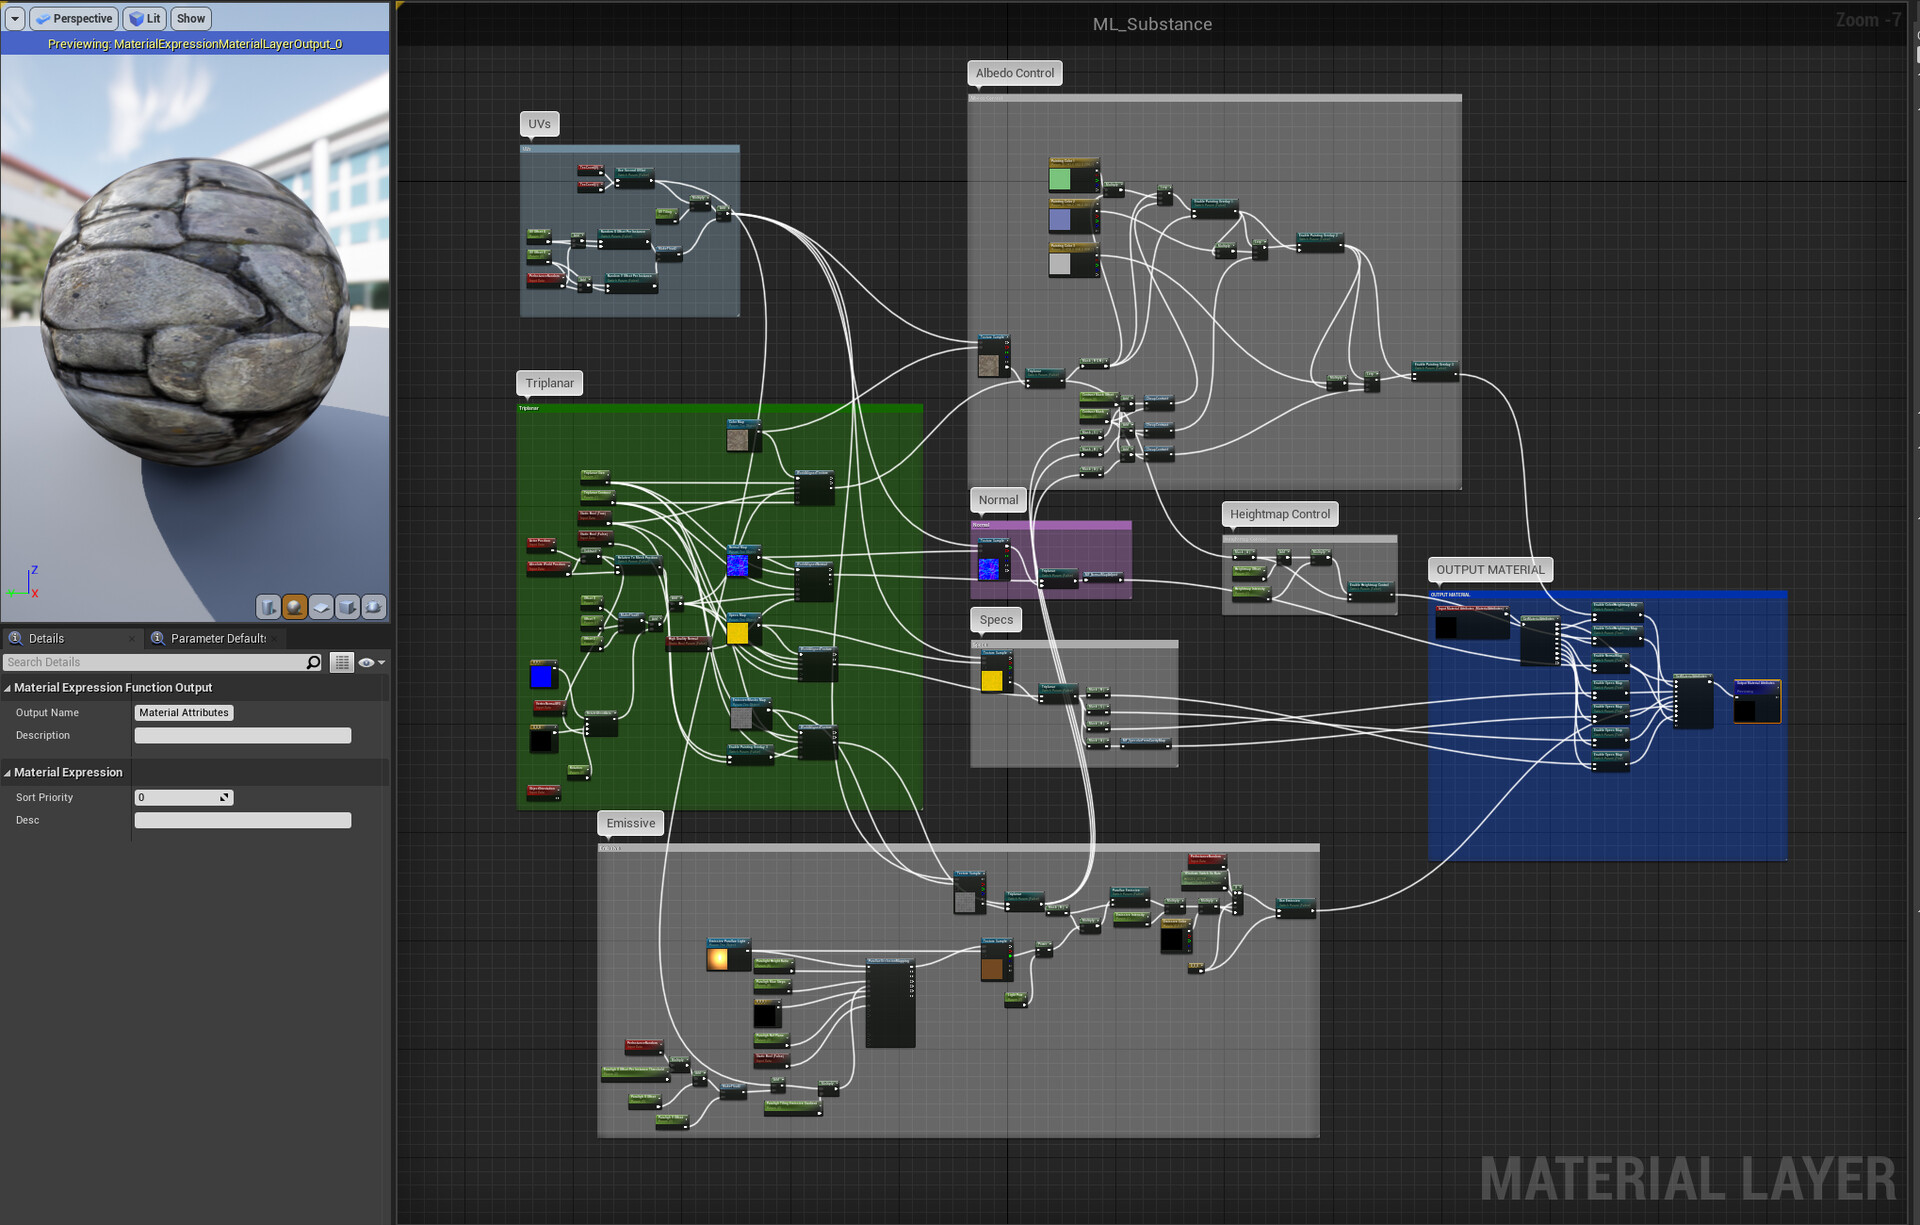
This is the our custom material layer's graph.
Here's an exemple of our material layer blends. No RGBA Mask but the blend is done by the heightmap stored in the diffuse' alpha. A mask can be added to control where this effect is used. Like, a AO map to apply this effect only in corners for instance.
Here, the Heightblend MLB is used to add some outlines around the masked area, to add a little visual depth and separate our materials. There's control for the size the color and the contrast of the outline.

This is the heightmap based material layer blend's graph.
The Heightmap to shadows uses the heightmap to modify the color of your diffuse.

This is the graph for the heightToShadow layer blend.
The WorldSpace mask allows the user to blend materials relatively to the asset's position, creating variations from one instance to another.

This is the WSmask layer blend's graph.
The Normal Blender allows the user to blend a normal map with the stack layers.
Here what we get using our houdini Building tool and materials layers. We gain a lot regarding assets variations and texture resolution, as we work with tilable textures.